Diagnosis: Love Mats

Hi there friends! Long time, no post. We’ve had lots of changes, and lots going on, but one of you (lovely Lynne) encouraged me to post about my pup, who will be one year old July 4. This is some of what he’s been up to recently.

Here is Griff, our little GoldendoodleHe was eight weeks when we brought him home.

And soon, he was walking around the neighborhood

Meeting all the neighbors.

Griff became the neighborhood watchpuppy.Faithfully watching over the comings and goings next door (who took this pic).

As you can see,

Neighborhood protection is very tiresome business

Griff went to training

His trainers said he was very elegant, and he showed off nicely for them. It seems, however, that our Griff has forgotten everything he learned.

He watched the Westminster Dog Show

And was quite mesmerized. (Did he wonder why there were no doodles??)

Last week I walked this furball to his groomer, Casey, who told me,

“We need take him to down to 1/4” because of matting. He has very bad love mats behind his ears.” What?? What the heck are love mats?? She asked me, “Do you scratch his head like this” and demonstrated while making the face one would make when scratching a curly doodle head. “Yes!” I exclaimed. I was mortified. She said everyone does this, and it creates mats. Who knew?

Now we’ll limit ourselves to a gentle pat now on the head and then. Or more likely, continue our evil ways of love and just brush his ears religiously. Love mats, indeed.

A whole new Griff, about twenty pounds lighter

and he seems proud of his sleek new appearance.

The rest of the menagerie

Frieda and Jasmine don’t come downstairs much anymore, since neither of them has any time for the big beast. Jasmine is afraid of him, and Frieda just hates him. And frankly, he is afraid of Frieda. You can sense the dynamic here.
Herein ends the recent pet picture extravaganza.

But don’t get me started on our new grandson…..

Happy days, everyone! (I’ve been sewing a bit! Watch this space.)

It’s All in the Golden Details

Greetings, one and all. You may remember reading about our recent vacation in Wales and England in my last post, and maybe you also remember the fabrics I brought home.

Two lovely bits came from Butterfly Fabric in Cardiff and the third from Brecon, where I was visiting family. One afternoon hubby and I walked into town and stopped in for a coffee, wandered around the touristy-shops, antique shops, real estate agents (well, yes of course, I always want to move there!) and ended up in an open market. Surrounded by the expected sights, sounds and smells (fish…..) of the market, we were surprised to stumble upon a woman set up at a long table piled with luscious cuts of fabrics! There were many beauties to choose from, but this Japanese cotton really captured my attention. Brightly colored, and highlighted with gold, this print was destined to become a kimono.

Now there was only one teeny little problem with that plan. Kimonos require rather a lot of wide fabric. This was just 2 meters of 44″ width cotton (and it would surely shrink) and there was a 12-inch pattern repeat. Yikes. I might have been able to squeeze the pieces on, but not with any hope of matching. The sleeves and/or body would be shorter than desired. I considered adding a contrast border at the cuffs and hem, but the border would need to be fairly wide, disrupting the print too much. Also, I had been “wearing” the fabric around the house now and then to get a feel for it, and decided it really wasn’t the correct pattern/fabric match after all.

What I needed now was not an actual kimono pattern, but one for a top with kimono sleeves!

My internet search turned up several options, and the Wendy Ward Fulwood Dress/Top pattern was perfect, as it had no back seam. I made no pattern adjustments, other than to add 1 inch to the length. (Well, in the interest of full disclosure, after trying on the basted version I thought perhaps side slits would be – ahem – a nice modification.) I sewed it up using the black thread already in the machine, but then happened upon a golden beige spool while looking for my misplaced hem gauge. Serendipity! It was too late to re-sew the seams, and although it wasn’t topstitching thread specifically, it would be just perfect to topstitch the facings, cuffs and hem. And I’m so pleased with how it turned out.

This is a casual top, but with the elegant print and gold details, it will be easy to dress up. Oh yes! A pair of gold lame cigarette trousers! Or maybe not – maybe just accessorize with a goldendoodle pup.

Being one’s own photographer is not terribly effective.

Now I would like to step away from my normal chatter for just a bit, if you don’t mind. It’s been my habit to apologize with every make, for the time and trouble it took for me to do something so simple. This lovely top, though, was quickly and easily put together. So when it was completed except for the hem, I simply hung it up and admired it for two days. Why? There was no logical explanation not to finish it in one short session. As I pondered my actions, it occurred to me that I was really enjoying the process, and this last bit, hemming, is just another piece of it. Each decision, each step, each moment of angst or accomplishment along the way deserved to be savored. Is this part of what the slow sewing movement is about? Beyond the environmental and social aspects, perhaps it also is necessary for one’s own peace of mind. Just let each project be, to come to fruition in its own time, to sit back and enjoy the process with no apologies. Or maybe I’m just finally growing up.

And finally, Lynn, this is for you!

Griff at 8 weeks.

Griff at 12 weeks. I think we may be in for big trouble with this little one…..

Happy sewing, and whatever method works for you, stitch on everyone!


How I Spent my Summer Vacation – and a Super Special Meet-up

Greetings, all! Long time no post. But I’ve been around (mostly on IG), doing a bit of sewing, planning lots more sewing, and having a lovely vacation in Wales and England. Some of the high points follow. Trust me when I say this is a majorly abbreviated look at our trip. We had so many wonderful experiences (I could write a whole post on the cheese alone!)  Be sure to read through for details of a meet-up with a special someone at the end. She’s a blogger and most of you will know her; she sews, she paints, she makes shoes and jewelry, she’s a writer, and a great photographer…can you guess who she is?

Here we go!

Our boat, and a few of my favorite things about her.

There are eight spare propellers –  seen here from the top deck. It was fun to wander through them.

The cloud of steam is actually coming from a red and black stack
directly behind this giant orb. They’re much farther apart than it seems here.

The radar tower is fascinating, with or without flags.
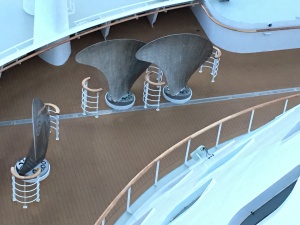
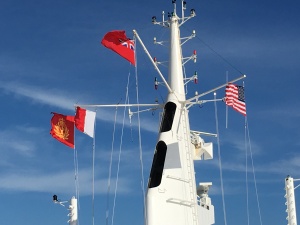
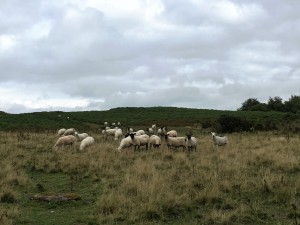
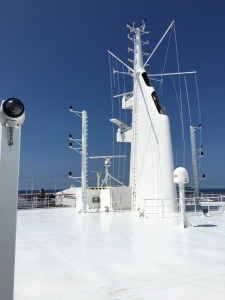
Good morning, Southampton, we’ve arrived!
We’re off to Cardiff, and rainy day Eistedffod at Millennium Stadium.
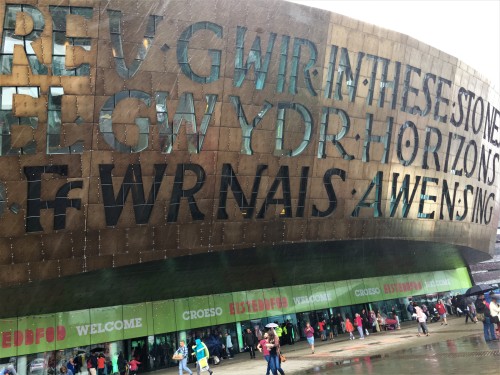
Pretty streets downtown (and the shops! and the restaurants!)
A planned visit to Butterfly Fabrics and a vendor in an open air market yielded this.

We explored ancient sites – such as Raglan Castle…

Hubby is at the tip top looking down on twinning cousins.

Photographing him photographing us.

My turn in the crow’s nest.

Stunning 360 degree vistas.

…and Tintern Abbey – remains from the 12-century

Looking out.

Looking in.

Looking up.

We found a high peak in the old stomping grounds near Brecon.

We also found sheep. Who would have imagined?

And horses. Wait a minute, no cows???

Well of course there are cows. This is Wales.

We spent two days in Cheltenham, in a lovely B&B similar to this one.

Prettiest administrative offices I’ve ever seen.

Dinner with another cousin and his family.

And after a short train ride the next day….

We are ready for the Shakespearean actors!

“Now just wait a minute”, you must be thinking. “Shakespeare? Stop teasing us! What happened to the super talented, sewing, shoe-making, jewelry-making, surprise meet-up announcement?” Did anyone guess who she is?

Would you believe Kate Davies of Fabrickated? Yes! The one and only. Her husband Nick retrieved us from the train station and drove us to their lovely home, where we were introduced to Kate with hugs all around. This lovely lady is just as I had expected – warm and welcoming, and all the good things. As we sat enjoying the view, Kate asked about my sewing progress, and my response led from one thing into another, such as children, family, losing loved ones, even a dip into politics. My thoughts were confirmed that we are of like minds on many topics. Somehow we never returned to the sewing conversation!

We had a quick tour of their home and I was wowed by the amazing sewing room where Kate works her magic. A colorful huilpil from her Dress Like Frida challenge was artfully arranged on the dress form in the window. A framed painting of a special dress she had created (from her own hand-painted fabric) was on the wall. With a place for everything, this room accommodates all her creative pursuits, and even allows guest space. This is what happens when two clever, artistic people design a home together!

Nick is a talent in his own right. Not only has he built most of the cabinetry in the home, he is also a marvelous cook. A delicious (and beautiful) lunch spread was waiting for us; meat, cheese, and veggies of our choice on homemade focaccia bread. All he had left to do was assemble it. And all we had to do was enjoy! Which we did, with gusto.

They had also arranged for us to see an outdoor presentation of Much Ado About Nothing on the lawn at Rendcombe College after lunch. The day was brisk and cloudy, but the cast carried on and never moved the performance to the stage indoors. It was funny, well-acted, and completely enjoyable.

They could have chauffeured us back to the train station, but instead took us all the way to our hotel. More hugs, and a most delightful day was complete.

Since the pictures included above are only a tiny fraction of the pictures I took on our vacation, you’ll be surprised (if not appalled) to know that the empty stage shot is the only one I took of the entire day with Kate and Nick. Likewise, Kate took only two photos (of our husbands), so to prove that my story is true, I’m sharing one of them with you! No doubt they are discussing their wonderful wives.

Kate Davies was the first “real” blogger to follow me when I started blogging, and has always been so kind and encouraging even as my postings dwindled. And now I have met her and consider her a friend. How very cool is that.

Be back soon, and in the meantime, stitch on, everyone!


She’s Alive!

The last year has been a challenge for me, and getting any project started, let alone finished, was difficult. I spent countless hours spent studying patterns, fabrics, and blogs for ideas and inspiration, AKA procrastinating. I wanted to make a polka dot dress, or top, as a bit of homage to my mother, and hopefully that project would give my slow, slow sewing a needed kick in the shorts.

My friend Del, https://curlsnskirls.wordpress.com/author/celtib47/, had gifted me a marvelous, soft and drapey polka dot rayon challis from her stash to sew this dress, and I began the pattern hunt. It had to be simple and flowy, with sleeves and no waistband. New Look 6340 was my chosen pattern, using View D with V-neck, short sleeves, and in-seam pockets, but opting for the longer length from View A. 

Having never made this pattern, a muslin was in order. I had just enough muslin fabric to complete the bodice, which was enough for fitting, as this is a swing dress and based on measurements, clearly large enough through the waist and hips. The bodice muslin almost fit, but was just a bit snug so I decided to go up one size (without making a revised muslin), even though the low neckline worried me. I cut it out and began to sew. This truly was an easy sew, folks, even for me.

For example, can I just pat myself on the back for this beautiful, perfectly sewn V-neck?

Nope, not so fast speed racer, the try-on after basting up sides and sleeves was, shall we say, revealing. Whoa. The deep V neckline? This was more like a plunging neckline! I don’t own a bra cut low enough to tuck out of sight. And let’s face it, the bosoms are not where they used to be, and the whole thing looked a bit saggy. No pun intended. Or maybe it was intended.

How in the world did this happen? How could there be so much difference from the muslin? I’m going to blame it on the fog of impending migraine. I couldn’t possibly have been thinking clearly when I ignored the only (and so, so easy) opportunity to raise the V-neck. Was this repairable? I could wear a cami, but that seemed so unimaginative. I thought of inserting a neckband, but there was not enough fabric left to make one. Could I use ready made bias tape? Of course, at this point I’d already trimmed and clipped all the neckline seams, making it even more difficult to take apart and reassemble.

So as soon as my brain was less addled, I remembered there is a Plan B, which was to baste it all together and try it on again. This confirmed that I could definitely bring up the neckline at the shoulder seams, add two neckline darts, and perhaps could insert a little bias tape piping along the sides of neckline. I carefully unpicked the neckline again, took a bit from each shoulder, added a dart on each side, stitched it all back together, omitted the piping, and it’s just fine. Go figure.

The dress was finally ready to be sewn together. The sleeves were easy, but the in-seam pockets were a first for me. Though the instructions were clear enough, I was sure a quick tutorial would be helpful, and I found this one right away: https://byhandlondon.com/blogs/sew-alongs/11628661-nerdy-sewing-tips-how-to-add-side-seam-pockets  These pockets were constructed just as the pattern described, but the visual example was so helpful.The process was simple and uncomplicated, not the pivoting hither and yon that I had imagined. Perfection.

The pockets may have been perfect, but a new issue emerged.

So much fiddling with the neckline, plus bias areas from the wide skirt resulted in a very uneven hemline. The dress had to hang for a few days, partly to fall into place, and partly because I was miffed at it for causing yet another delay. After sufficient “hang time”, I tried it on again. The whole thing was still quite loose and the hem was a good 2″ longer in the back. Too long, but not long enough to be a definite high-low style. There must be something that could bring in the excess fabric at the waist as well as bringing up the back hem. My only solution was MORE DARN DARTS! Fish eye darts in the back would bring in the waist a bit, plus raise the hem. So I just eyeballed it, and pinned out 2 long darts in the back. Dare I show you? No! It’s so embarrassing. Never! Okay, yes. Pretty impressive, eh?

It looked as if there had been bike races up my back. Funny though, how both darts took off in the same (mis)direction! Not one to be outsmarted by a dart, I knew there must be a tutorial on making real fish eye darts. And of course there was. The one I selected was Craftsy https://www.craftsy.com/sewing/article/how-to-sew-a-dart/ which gave instructions to properly measure and place the darts. The new darts were spot on.

At last it was on to the final try-on. Curses. The darts had brought up the back, but the sides were still much longer than the front and back; certainly not the intended result. I hemmed and hawed (sorry, couldn’t resist) and wondered how to fix it. Should I try to measure from the ground up by myself? That seemed impossible. From the top to bottom? That didn’t make sense. Just start pinning and see how it went? HA! We know how well that went the first time. The hem would still be wonky, just a bit shorter. And then I had a brilliant idea – let’s line it up with the pattern pieces. That should show me where the original cutting line was and how the hem should look. Right? So, you must know what’s coming next don’t you. Another tutorial! Megan Nielsen had one that seemed just right: http://blog.megannielsen.com/2015/06/a-simple-trick-for-evening-out-the-hem-of-a-circle-skirt/ What was her advice? TO LINE IT UP WITH THE PATTERN PIECE!! I am a genius after all. Now the hemline was (nearly) straight, but the front was too short to turn under twice, so a cute little narrow hem was out of the picture. After another conversation with Del, I decided that lace hem facing and handstitching was the way to go. This must be the easiest way of all to make a hem!

I just cut off the excess hem fabric, added a package of lace, and voila! We have a hem that is even and pretty.

At last, my long-suffering dress is finished!

It’s taken so long to get this made that I think I should name her. Her name shall be Dotty and she is my new favorite thing.

What’s next in the queue? Vacation sewing! Considering how long it took to complete one simple dress, I won’t even pretend to be creating a me-made vacation wardrobe. But if the stars align, I hope to finish my blue and white birds top and maybe make a cocoon dress or a pair of pants or a kimono or a cardigan in the next few weeks before sailing away. Where would you begin?

Thanks for reading, and until next time, Stitch on Everyone!


Spots Before My Eyes – Sewing Reboot

Hello friends, it’s me, Jen, from Let the Sewing Begin. I’m still around … and dare I say it … sewing. The Sewing has BegunTra la!

What has changed, pray tell, to create this new status?  I don’t know what it is exactly, but since retirement it’s been a struggle to keep myself going in any direction for any length of time. Yoga – still going, but sporadically. Sewing – mostly pondering and considering and  worrying about making mistakes. The smart me has always known how to make such decisions, but a dimmer version of me has been getting in the way recently. So now – up in the morning and dressed! Catch up on coffee and news (although the news would make anyone crazy these days). Yoga on yoga days, and sewing as soon as possible, whenever possible. And, this might be the key — a little spritz of Mama’s perfume cheers me and makes a good beginning to every day! Recently I’ve been buying patterns and fabrics – and I’m itching to cut into them.

First up, a muslin for the Grainline Farrow Dress in my lovely dotty material. This time, I set right to work. My first ever attempt at pattern tracing delivered a sturdy, reusable pattern! I laid out my muslin and cut the top, sleeve, and facing pieces. Shortage of muslin meant a second fabric was necessary for cutting out the bottom half. Color blocking! And it looks deliberate, doesn’t it?
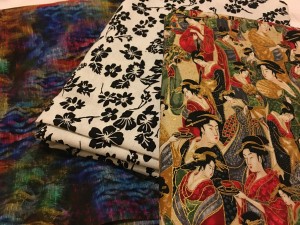
What have I learned through all this eager project undertaking? First of all, I love this pattern. It’s architectural and dramatic, and for my toile, the combination of yellow linen(ish) and plain muslin are so cool! Alas, the fit is somehow off. The pattern is designed to be very loose, but this seems so bulky and wide. I believe the problem lies in the differing fabrics for top and bottom. The yellow is quite heavy (3 layers) where the front pockets lie, which may be throwing off the fluidity. And by-the-way, can we talk about those pockets? The layout was confusing at first glance, but once the light bulb went off, they were easy to create. They just look so darn good, and are perfectly placed for me. The neckline is still unfaced and hem unhemmed, but it was enough to decide that the neckline and shoulders fit well and I’ll probably add an inch or so to the hem. The mismatched sleeves of course, were just to compare which length looks better. I’m leaning toward the short sleeve, as it seemed rather heavy and too-covered-up with the long one. What do you think? The decision might ultimately rest with the season when it’s completed. (And why such a glum face in these photos, for goodness sake)


I am planning to make a “real” Farrow using this color scheme or a similar one, most likely in linen. And creating the back side of pockets in a lighter weight cotton might be helpful. Another option would be a bold graphic print. (This pattern does remind me of the Eiffel Tower; I’m rather tempted to find an Eiffel Tower print….)

What all this is leading up to is that my soft, flowy fabric just did not feel right for this pattern. The Farrow deserves a nice bold substantial fabric, and the soft dots will be better with a more fluid pattern. So, my research has produced numerous results, and these are the two finalists: Simplicity 6340 or the Style Arc Lara Dress. Of those, I’ll probably choose the Lara. Any thoughts?

In the meantime, Jasmine watches snowy cat tv, and fabric waits patiently for the new pattern to come. It could all begin as early as tomorrow morning.

Keep watching this space for updates, and stitch on everyone!


On Changing One’s Mind and How That Works Out Sometimes

Changing one’s mind is definitely better than losing it, wouldn’t you agree? And it can certainly bring a happy result.

Here are the details (and my apologies for such shoddy photos). After my miserable attempt at a Linden toile, I decided to switch gears and sew a cute little lap blanket, the perfect fail-proof project. I washed and dried the fabric, and laid it on my table to round off the corners and stitch the edges. Out of the corner of my eye, I noticed my sewing machine, silently waiting with the gray thread still in, and the stretch needle still poised. It must have been a sign. There was no reasonable choice other than to finish up the Linden before beginning something new.

Originally I’d cut the neckband from the pink fabric, but discovered after basting it on, I didn’t like it at all. However, there wasn’t even the tiniest possibility of enough gray to make the neckband instead. Or was there? I found two large-enough pieces left, but alas, the stretch was going the wrong direction. Dig, dig, dig. Eureka! One long, skinny piece appeared. It was just long and wide enough, had the proper stretch, and my shirt would have the proper neckline.

I took off the pink one, attached the gray one, trimmed and understitched it, and the neckline was completed in mere moments. (And rather nicely if I may so.) The sleeves were long enough just to hem, although on second look I really should have made them wider – these are a bit wavy.  The top, though, was a little too short for a plain hem. So I attached the pink hem band, and voila! My Linden was transformed from the wadder I originally proclaimed it to a comfy, wearable top. It’s quite roomy, and the fabric is super soft. And now I’ll know how to alter my next one, so behold my first successful muslin of 2018.

Two thumbs up for making the right decision. Now I can stitch up my fun little blanket project, do a bit of mending, seek out the perfect fabric for my next Linden, and begin work on the muslin for my beautiful dotty Grainline Farrow dress.

Stitch on, everyone!

Wrapping Up 2017 – The Unposted Bits and New Plans

Welcome All and Happy New Year!

Here you’ll find some bits from unfinished posts, tidied up, and combined into what I hope will be an interesting wrap-up to close out a difficult and heartbreaking, yet ultimately joyful year.

We celebrated Thanksgiving in the US a month before Christmas, and I was overjoyed and thankful to have my grandson “C” here to share his week off from school with us. This was his first visit here in NY and there was much to do in a short time. We showed him around our neighborhood and surrounds. We drove him to two major colleges (certainly not an attempt to entice him to the East Coast for college, right?). We went out to eat. Again and again. We went to the Rochester Museum and Science Center, and enjoyed a fascinating exhibition at the Planetarium.  Hubby showed him a nice necktie from the science-themed offerings in the gift shop, which featured the periodic table. C thought it was cool, but said he “could never wear it.” Why?, we asked. “That table is outdated,” he said, as if we should have known better. Oh how I laughed. [Aside: hubby of course, new about this. Three of the elements had been renamed.]

We drove to Niagara Falls (the US side) and marveled at the scenery, all the while shivering in spite of brilliant sunshine, and bracing against the icy wind which nearly knocked us off our feet.

Back home again, we stopped in at Stever’s Candy. C bought a package of chocolates for his mom and promised he would try to save some for her. Later she said “he told me in his Forrest Gump voice ‘I brought you a box of chocolates….I ate some of them.'” That’s my grandson. He’s a keeper.

Christmas holidays we spent with my kids in California! What could be better? Handmade gifts were started but sadly not completed, and Gran’s recipes were gathered together, but not used. It seems we are still a little too raw from Mom (Gran) recent passing, and adult children have lives and jobs and such, and plans just didn’t quite come together in every instance. As I was in a wounded state, being together helped. Tears were shed, funny stories were shared, and bit by bit the holiday became what it was supposed to be. A lovely series of events and quiet moments, surrounded by loved ones. Those times combined with the warm, sunny beach just steps from our hotel room was positively curative. Oddly, I took no pictures of family activities, but here are some from the beach. In lieu of family, here’s a new friend….he walked along the shore for a bit at sunset with hubby and me.

Now for a bit of sewing news. My finished Linden. Who doesn’t love a Linden? That would be me. Well, this particular Linden, that is. It was actually a muslin, made from remnants in the sale bin, purchased nearly two ago years in England. As it happened, there was not enough of either fabric to complete the long-sleeve version, so I used a bit of each. The result was a nice-looking combination that seemed like it might actually be wearable. Now, I’m not overly fond of the 12-year-old boy baseball shirt that resulted, but beyond appearance, the fabrics really didn’t play well together. They didn’t really play well individually either, as one had about 200% stretch (give or take), and the other had edges that rolled beyond description. And the neckline is far too wide, perhaps due to the unruly fabrics’ unnecessary stretch. Additionally, during the making of this very easy garment, my sewing machine failed me a couple of times, my own lack of attention created a “catching up of fabric in the seam” moment with stitches that could not be  found, and the whole experience was just a bit taxing. Does it need to be said that this garment is a total wadder? It will never be worn. But, it fits without modifications, and the pattern is lovely, so as a muslin it worked and I’ll soon make another.

This pic shows that the unhemmed  sleeves are nearly long enough without cuffs, I’ll need to add a few inches to the body length because I don’t want the band, and just look at that neck opening. Admittedly, I haven’t attached the neckline yet, but boy is it sloppy. And see how much the pink edges are rolling? grrr.

The ultimate result? In the bin. Or if I can stomach it, I’ll rescue and finish it for a painting top.

My hubby does zazen meditation and was in need of more support cushions for an upcoming retreat (I’ve done a little zazen and it’s very hard on the knees and back). The cushions must be brown, so while on our holiday we sought out an appropriate brown material, and came upon a likely one at a little fabric shop in California. With no pattern or measurements to hand, he made a guess as to required length to buy, and I increased that by about 1/2 yard. Upon our return home, he trimmed and tidied the foam pieces and I set about making simple pillow cases as a trial. If they’re successful, I’ll try to box the corners (see the nicely finished professional pillow on top of stack), and finesse the opening a bit (they do need to be removable for cleaning). And the yardage? There was less than 1/4 yd left over, so it was close. Whew!

Dots are in my immediate future.

My next sewing project will be my dotted Grainline Farrow. Then I have an adorable top that needs finishing, a fleecy Linden to sew, a muslin for an open jacket whose pattern should be in my mailbox very soon and cozy fabric to purchase for it, and a few lovely pieces of fabric begging to finally be made into something wonderful.

My life has settled down a bit now, and thankfully I can devote more time to sewing. My wardrobe needs a complete overhaul, and I’m also including non-garments in my sewing plans. As of this writing, my desired makes include dresses, some crafty projects, pants (jeans perhaps??), cozy comfy tops for winter, some pj’s, Christmas items, and curtains for my kitchen. That should keep me busy, wouldn’t you think?

But at this moment, I need a bit of stress-free pleasure and this little lap blanket from FinchBox is just the ticket. Everything I need is right here, including the prettiest, softest flannel ever.

Thanks for reading, and until next time, Stitch On Everyone!


Stitching Santa 2017 – Happy Stitching New Year (ooops)

Sheila of Sewchet again sponsored her StitchingSanta, a secret gift exchange. Once more, I signed on, and eagerly gathered sewing goodies for my recipient. Truth be told, however, I was slightly reticent, since after so recently losing my mother, my heart just wasn’t in the holidays this year. I was rather worried that my partner would receive short shrift.

I needn’t have worried however, because of the neatest little twist of fate. You see, last year my recipient was a quilter and I am not. What in the world does one give to a quilter? I scrolled through the US participants and discovered, tra-la!, a quilter. I emailed her straight away and she was so kind to respond with a massive list of possibilities that any quilter would love at any time. I purchased or “found” items working almost exclusively from that list, and my recipient Susan, of Desert Sky Quilting,was pleased with everything! Do you know where this is leading? To my 2017 recipient! The very quilter who so kindly helped me out last year! Becky, of Power Tools with Thread, had given me a list of the items I needed to make her Christmas a quilters’ delight.

Per her list, I included some Clover wonder clips, a blue disappearing marking pen, some adhesive sandpaper dots, and some quilter’s pins. I also included some items from stash – seam tape, variegated blue thread, and a “deluxe” needle threader, which she loved and needed badly! And a cute little homespun candy cane ornament, which I just couldn’t resist. They all fit into this little handmade fabric bag.

Also to be included were two more items from her list which I ordered in plenty of time for delivery. Sadly, the company had a major snafu with their holiday mailings and mine was among the many not delivered in time. I received it Dec 29, the day we returned from California, and I had to wait till after New Year’s Day to get it into the mail. And so Part 2 of her parcel, now dubbed Happy Stitching New Year, is on its way to her at last.


Thanks for your patience, Becky, and may 2018 be snafu-free for all of us!


Stitching Santa 2017 – My Santa is a Sweet, Sneaky Genius

Thank you to Sheila for hosting another year of #StitchingSanta, a secret Santa gift exchange open to all stitchers, knitters, and crafters.

The backstory. I discovered Danielle otherwise known as @Nell1120 on Instagram. She recently posted her participation in Stitching Santa with a sneak peek at what her recipient was getting. One of the items was a little handmade fabric basket, the very one I was making for my own partner. I commented on the post saying my recipient was getting one, too, and she slyly replied “too funny! They’re so useful, aren’t they?” I secretly hoped that Danielle was my Santa. And she was! (Oh, and I just learned she blogs at Enchanted by Books, you’ll want to go that it out.)

My package arrived just as we were leaving for a Christmas visit with my kids on the Central California coast. My conundrum – do I open now? Or wait till we return on the 29th? Of course I wanted to open immediately, but I deferred to the community who would all be opening on Christmas Day. Waiting was the proper response. Curses.

We returned on Friday morning Dec 29 and as soon as we were in the door, I opened my parcel.

Oooh, my box is stuffed with this….

ss2017_IMG_3229

Unwrapping revealed…more unwrapping!

ss2017_IMG_3231

And after all the unwrapping, look at this haul!

ss2017_IMG_3232

Danielle sent a most eclectic assortment.  A pack of five Christmas fabrics, a pack of white lace seam tape, a cute monogrammed tea towel and spatula, a little jar of pretty buttons (who doesn’t love buttons!), a tiny little ice cream charm, a chunky Christmassy coffee cup, and two handmade items – the cute little fabric basket and an adorable stripey pin cushion.  You won’t see the assortment pack of hand needles because they were apparently camera-shy.

Here is a close up of the pattern: it’s Butterick which has always been a favorite, and I just might have the perfect fabric already in my stash.

ss2017_IMG_3235

Special closeup:

ss2017_IMG_3381

I wanted to be sure you all can see what this is. It’s just a little charm. But in her card, Danielle said she included it hoping to bring a smile, as she knew I’d still be sad over my mom’s recent passing. Mint chip was Mama’s favorite (and mine) and this was such a sweet gesture. It did bring a smile, and will go onto my key ring.

So after all, it was best to open my gifts after our Christmas holiday. It prolonged a little bit of joy for another day.

Thank you Danielle! I love it all, such thoughtful and kind gifts!


Hey Kids, We’re on a Roll Now!

We’re on a roll, I say. Really? you ask. How many garments have you completed?ONE! (Does one garment really constitute a roll?)

The Hudsons! Remember them? They are on my makenine list for this year. And they have been on my cutting table for an embarrassing number of days ….weeks ….months. But, they are finally finished!

This make was to be a toile, from sale bin fabric. No big loss then no matter what, so I would just bite my lower lip and cut right in, hoping to have a successful, wearable pair of comfort pants at a low cost, and know how to adjust the fit for a new, “better” pair. But look at this rare magic moment … when I uncovered my machine to get started, instead of a shambles, I found this:

Everything was set up and ready to go before being covered up!

So off we went, and the world’s slowest sewist (oh look, an alliterative rhyme) cut out the pants in short order. So easy! Fronts, backs, pockets, waistband, cuffs. I should have been well on my way at that point, but I needed elastic and cording. My closest fabric store is about 10 minutes away. So how many days did it take for me to complete this task? Seven! The bottom line is, after acquiring the last necessary items, I stepped up to the table and cut out the pants. I carefully marked all the pieces, and pinned the pocket lining to the pockets. Then my life began to cave in, and the Hudsons were cast even further to the background.

While I wasn’t sewing I began reading my favorite blogs again (not commenting, not posting, just reading). And from time to time, checking my emails. A newsletter from Karen Ball of Did You Make That? waited for me, asking folks what they would like to see her address. You know, problems or issues we may have with sewing. So I spilled my guts and asked for help when the sewing is just too scary to attack. And she used my question in her blog! I took Karen’s advice to allot a short amount of time to sew and when time was up, move away from the machine. Allowing myself to sew in only tiny bits freed up my worries about not accomplishing a damn thing and just see what happens. Well, my Hudson pants happened! And this is roughly how it went.

Day 1. Pockets. Pocket 1 – it was perfection! Boy am I good. Pocket 2 – the bloomin’ thing was inside out. Curses, perhaps I’m not Susie Sewist after all. However, after moving the pocket to the proper side, all was well.

Day 2. Side and crotch seams. Easy peasy.

Day 3. Waistband – hmmm do I really need that cord? What a pain it will be to do all that work, there are two buttonholes and a channel to create. But determined to do it properly, I followed the pattern and my buttonholes are perfect. Next step, attach the waistband to the pants. In so doing, I caught up the pocket in the stitching and with a sigh, began the unpicking process. Guess what? I had run out of bobbin thread! No unpicking required. This project had adverted its own crisis! Another magic moment.

Day 4. Attaching the elastic was the next challenge. With elastic in place, I basted using colorful rainbow thread because sheesh, this a lot of black thread on black fabric and my old eyeballs needed a rest. I sewed the bottom edge of waistband to pants, and tried them on once more. This was going to be one comfortable pair of pants.

Day 5. First cuff. Next I tackled the final piece of the pants puzzle, the cuffs. First cuff – meh, not bad. That’s all for today. Tomorrow will be the grand finale!

Day 6. Second cuff. Can you see the overly pinned cuff waiting for me, just behind the machine? I quickly sewed it up, and took it to the ironing board. Yikes! what happened here? Bunch upon bunch upon bunch. Once again, seam ripper to the rescue, and with only two short segments to sew (or resew, if that’s a word) with fewer pins, the cuff fit over the throat easily, and the job was at last complete.

After a good press, I am thoroughly enjoying my new, super comfy, wearable Hudson pants.

And the moral of the story? Sewing is a very humbling activity, but sometimes the magic happens. It turns out that my cheapo fabric is a wonderful ponte and my new pants are beyond wearable; they fit perfectly as printed, and are perfectly suitable for public viewing! I love my new Hudsons! Must make more. Many more. Gray, green, blue, red, wild prints. We shall see. And I must find a more dignified method of taking selfies.

Next up: the toile for my dotty Farrow Dress, which will be made of this luciousness.

Thanks for indulging me, and stitch on, everyone!