The apron project is finished! But before we can begin, the first order of business is to apologize for the photograph quality. I will blame it all on the heat. The blurriness, the washed out color, and my “it’s-too-hot-to-care” hairdo compensated with red lipstick – all due to the summer that refuses to end.
Okay then, here we go.
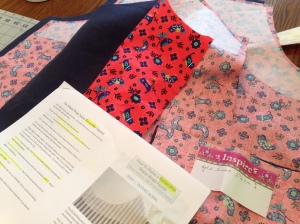
The Maria Wrap Apron pattern I found on Etsy, by way of Pinterest. I ordered the downloadable pdf and was all set. It seemed straightforward enough, to make a reversible cross-back apron, right? Just make two and stitch them together. Well, not so fast. I knew I’d need help with this and Sharon, creator of Maven Patterns, was kind enough to create a tutorial for a reversible version.
My plan was to have black (or charcoal) linen on one side reversing to black/white dots on the other. This is what I ended up with – navy linen, and coral ground with blue birds. Not quite my original plan, but so much better!
Now, this might seem to be a very simple project, it’s just an apron, after all, but this struggling sewist had an issue or two. And there was nothing and nobody to blame but myself. Don’t you hate when that happens?
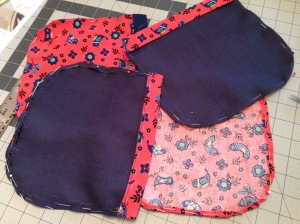
My first problem arose when I started the pockets, which as you can imagine, was pretty early in the project. Simple patch pockets. Anyone could make them. Well, I apparently wanted to do something squirrely with the folding, and they came out backwards. Fortunately I was practicing on an old dishcloth. In addition, I wanted the pockets to stand out a bit, but just using the reverse-side fabrics seemed too obvious a choice. My brilliant idea was to make a bias tape for top of each. Me? Make bias tape? Oh yes I did! But only for the navy side. The linen didn’t seem conducive for a narrow bias strip, so I bought a pack of navy bias tape ready-made for the birdy side. And it worked! And I managed to think clearly for a moment and get the pocket folding figured out. Here they are in all their glory…..
And the other little issue? Well, let’s not even talk about the fact that I had to whine to Sharon about how I had got the straps crossed into spiraling tubes, whatever shall I do? Sorry, Sharon. Thank goodness I was basting everything first. After calming myself down, I was able to persevere, and my fabulous new apron was nearing completion.
What I learned.
- Four layers of fabric placed directly upon the hips are not the very best idea, unless one has such narrow hips that padding is helpful. That has never been my problem.
- Select appropriate weight fabrics. My next apron will probably not be reversible, and if so, I’ll use lighter materials.
- Carefully read through the pattern instructions, and don’t begin on your fabric until it all makes sense. And don’t be a sissy la la. It will all be fine. Breathe.
- Press, press, press. While this is not a new concept (even to me), it is called out several times in the instructions, and I followed it faithfully. Makes everything so much easier.
Some fun bits along the way:
My friend Rip is a multi-tasker – very useful in removing pins while stitching.
The pattern didn’t call for seam neatening, since all are enclosed, but it seems that the linen frays enough to need a little something. So, reason enough to purchase a set of pinking shears! Slowly building my sewing arsenal.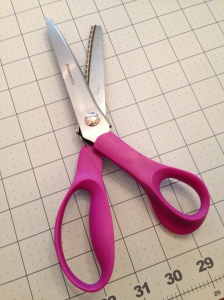
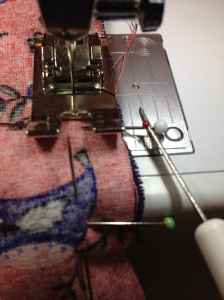
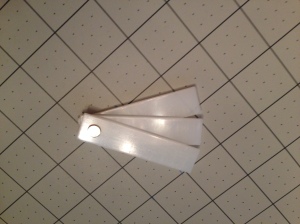
Another goody that came with my sewing machine is this nifty height compensating tool, perfect for going up and over all those thick seams on pockets and straps.
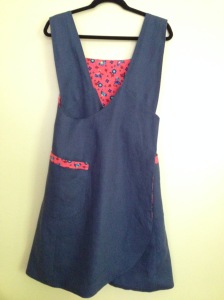
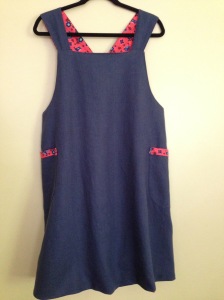
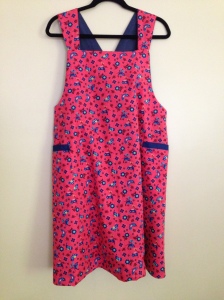
And here is how it ended up. The finished front and back of the navy side. And the finished front of the coral birdy side. The hanger (or photograph) doesn’t do it justice. The hem really isn’t jagged and uneven. Honest.
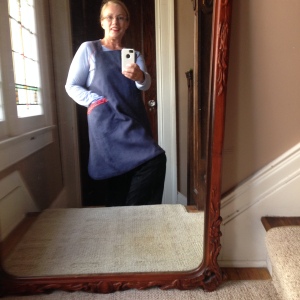
And here I am modeling my new creation. I’m happy! On to the next project…


You’ve done a good job with your apron and learnt lots along the way too. The first (and last) time I made an apron was in sewing class at school – we made it in the first term to use in cookery class in the second term. My sewing skills were ‘undeveloped’ shall we say back then and my sewing teacher called me ‘gormless’. I had to go home and look it up in the dictionary and it was not encouraging. She’d be amazed if she knew I went on to actually take up sewing as a hobby – just as my French teacher would be if she knew I went on to live in France!
BTW I’ve never seen one of those ‘height compensating’ tools before – is it specific to your machine?
LikeLike
Thank you very much! I must look up “gromless” – rather suspect it would have applied to my 7th grade sewing skills, too. Teachers were not particularly encouraging in our school day, it seems, but isn’t it funny how drastically things change for us? From my French classes in high school and college, I have only the most bizarre bits that have stayed with me. (How often can you throw “je me suis cassé la jambe” into a normal conversation?) A trip to France is in the plans in the next couple of years – better brush up!
It did come with my Bernina, but others may offer a similar device. It is perfectly genius! Dritz has a “Jean-a-Ma-Jig” that is available at Joanne and Amazon. Who knew?
LikeLike
I am not surprised you are happy. It’s a lovely garment, and I am interested to see if you could adapt it to make a pinafore dress. There is so much learning in it, and you have really done brilliantly. I love the pink pinking shears too.
LikeLike
Thank you! It’s quite fun (very heavy though, nicer for winter). The pattern does have another view that is for a pinafore. The back closes around further and has a different pocket arrangement. I had a little “poof” in the printed side, so didn’t edge stitch the back/hem, but perhaps I’ll just accept that fact and stitch around so it makes a tiny border around the edge? What do you think? Or leave well enough alone…. And oh yes! What could be more perfect than pink pinkers? 🙂
LikeLiked by 1 person
I don’t know what to advise – I often have this conversation with myself too!
LikeLike
Haha! yes, I’ve been going round and round………..but it’s done. I shall just let it be. 😉
LikeLike
Well done Jen, it looks FABULOUS!!! Loving the binding on the pockets 🙂
LikeLike
Thanks so much Sharon! It’s a really nice pattern and was fun (despite my “moments”) to put together.
LikeLike
the apron is sweet! Good job!
LikeLike
Thank you! I have a “thing” for aprons. Checked out your site — very nice!
LikeLike
I love aprons and ‘pinnys’ too. Love this one. Bravo!
LikeLiked by 1 person
Thank you!
LikeLike
Love the pattern- easy to wear!
“Four layers of fabric placed directly upon the hips are not the very best idea, unless one has such narrow hips that padding is helpful. That has never been my problem.” I can relate to that!b
LikeLiked by 1 person
Haha! I never gave it a thought until it was completely finished and on my hips! 😀
LikeLike